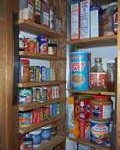
The Mission: To Organize Your Kitchen Pantry in Four Simple Steps
Sometimes we find ourselves in an all or nothing mode. Or we may feel, I would like to have my pantry organized, but do I have to go as far as alphabetizing everything? That’s too time consuming—forget it I don’t have a week or two.
Yet you need to navigate through the pantry easier. You need to simplify your meal planning, to be able to prepare meals quickly. On special occasions, you want to have a well designed meal but not duplicate and purchases in this tough economy because, of not knowing what’s in the closet.
I am sure you are not alone in this dilemma. When I visit a client’s home, sometimes they are apprehensive about the process because of not knowing how long it will take to organize a pantry. They wonder, will she implement a complex system and then I will not be able to maintain. The answer is no!
I help you develop a system that works for you and your family. So every solution will be different, pending the client’s need and requirement.
My 3 step process is to help you alone, accomplish your purpose by breaking it up into 3 days, whether it’s during the week, or the weekend.
Step 1: Trash/Purge
- Get a garbage can or trash bag, and brutally weed through the stuff and get rid of expired items. Stale and spoiled items. See website for suggestions on shelf life for some of these items. http://www.stilltasty.com/articles
- Tip: This is a process you may want to do every 6 months. Write it down on your calendar/planner as a reminder.
- Tip: Take edible food but that you no longer want to a local food bank.
- Tip: This is a good time to clean your shelves.
Step 2: Sort
- After purging, then group like items together for example: pastas, beans, can goods, group baking items together, use clear containers to put flour, rice and pasta.
TIP: You can also separate by meal times, breakfast shelf, lunc.h shelf and dinner shelves. If you have small ones, ensure that you place on their level their allowed snack treats.
TIP: Use baskets for items that cannot stand on its own.
Step 3: Assign
- Now that you have all the items you need, assign groups a home. If necessary, expand your shelves with wire expanding racks. I find that Wal-Mart, Target and Big Lots have inexpensive systems to help expand your pantry space if needed. Use lazy Susan for your spices, bulky items hard to reach.
TIP: If you have a door, door mounted racks with shelves (see my before and after shots)
TIP: If you have floor space, use kitchen carts to add more shelf space.
Step 4: Label
- It does not have to be a fancy labeling system. The benefit, you know what you have, you know where to put it, and if your family is helping you put away grocery, they will know where everything goes. Good for maintenance!
Mission accomplished!
Nancy Rivera at 813-514-5696 If you still feel that you need Nancy’s help, call her for a free 30 minute consultation.


